A Guide to Floorplan Sketching
A Guide to Floorplan Sketching
Updated:
Learn how to easily create a scaled floorplan of your room, whether on paper or digitally, to optimize your interior design.
Learn how to easily create a scaled floorplan of your room, whether on paper or digitally, to optimize your interior design.

Whether you’re renovating your home or simply rearranging your furniture, sketching out the layout of your space is a crucial step in the interior design process. A well-planned layout can help you visualize the potential of your space, ensuring your furniture fits and flows naturally. In this guide, we’ll walk you through a simple method to create a floorplan, even if you’ve never drawn one before.
Getting Started: Tools for Sketching
You don’t need any prior experience to follow these steps. Whether you prefer working with pen and paper or digitally, both methods are easy to master. For this demonstration, I’ll be using Google Slides, which is free, but you can also use PowerPoint or Keynote. If you’re going the traditional route, you’ll need paper, a pencil or pen, a ruler, and a pair of scissors.
Understanding Scale
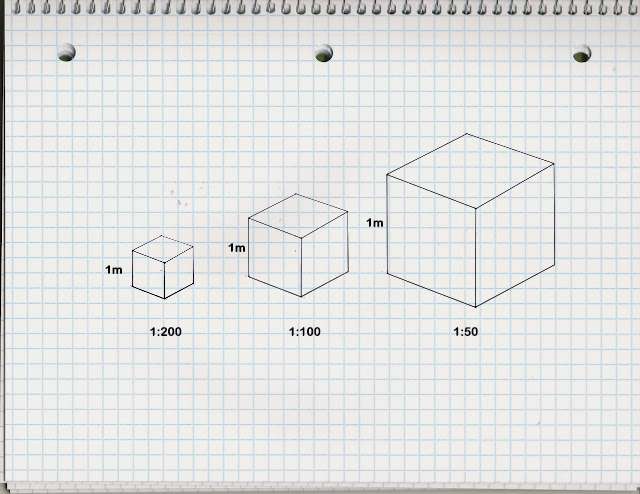
Before we dive into drawing, let’s talk about scale. Since your room is much larger than the paper or screen, we’ll be scaling everything down. The key to a good floorplan sketch is that all elements are reduced by the same percentage, ensuring they stay in proportion to one another.
For instance, if a wall in your room is twice as long as another, it must also be twice as long in your sketch, even though the measurements are reduced.
Setting Your Scale
To start, we need to set a scale that ensures your sketch will fit on the page or screen. Architects use fixed scales with specialized rulers, but for our purposes, we’ll create a custom scale that fits your space.
Start by marking the longest wall in your room. If it’s 7 meters in real life, create a line that is manageable within the space you’re working on, like 1/7th of the page. This smaller measurement will represent 1 meter, and we’ll use it as a benchmark for the rest of the sketch.
Drawing the Room’s Outline
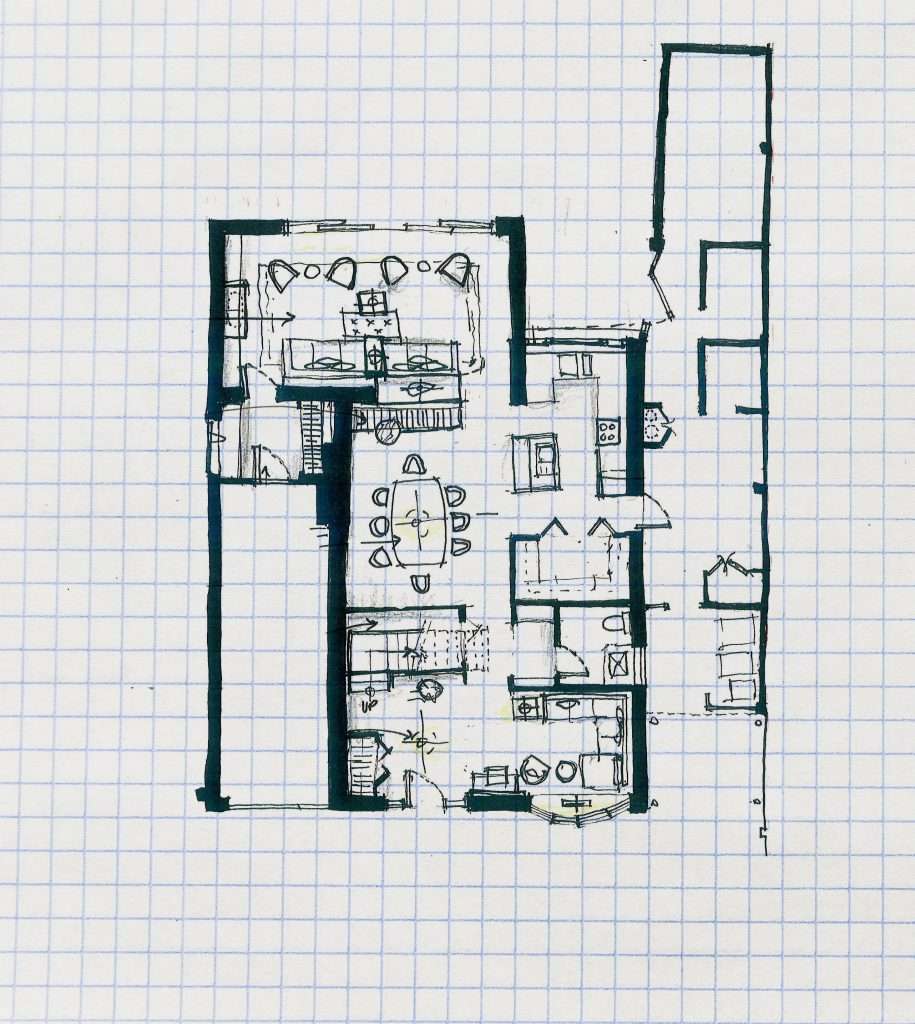
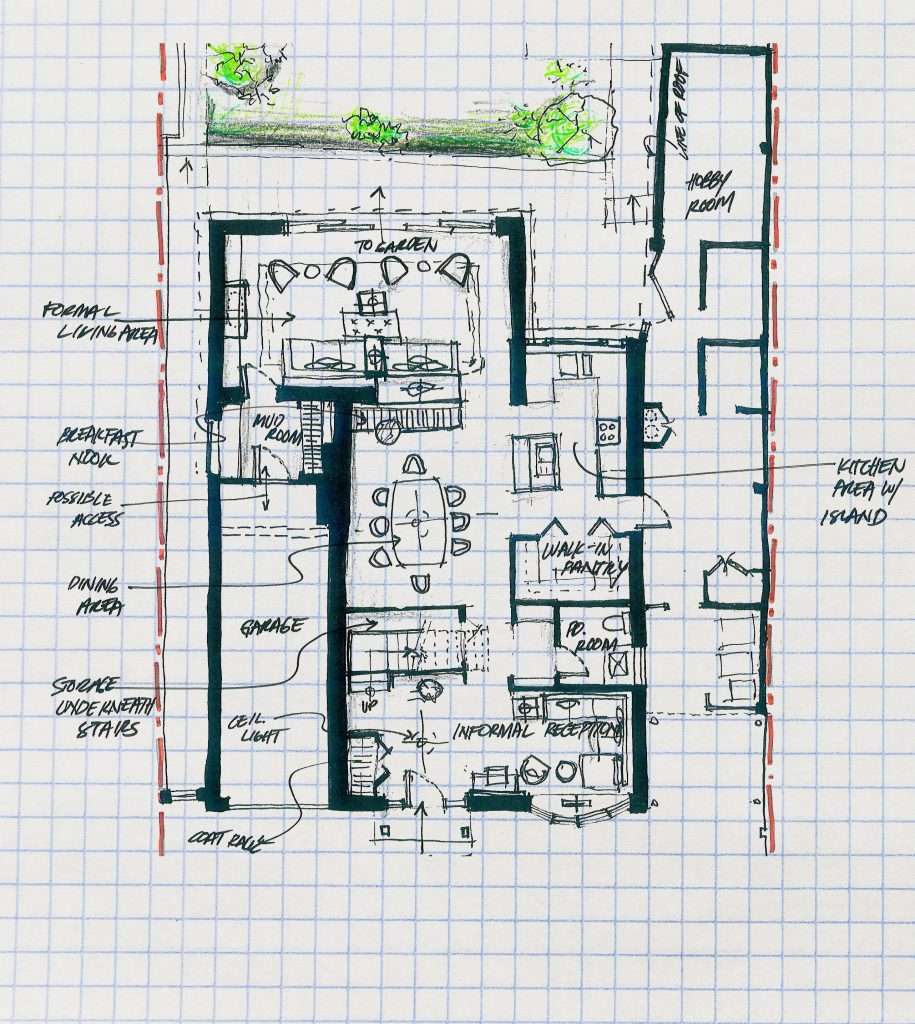
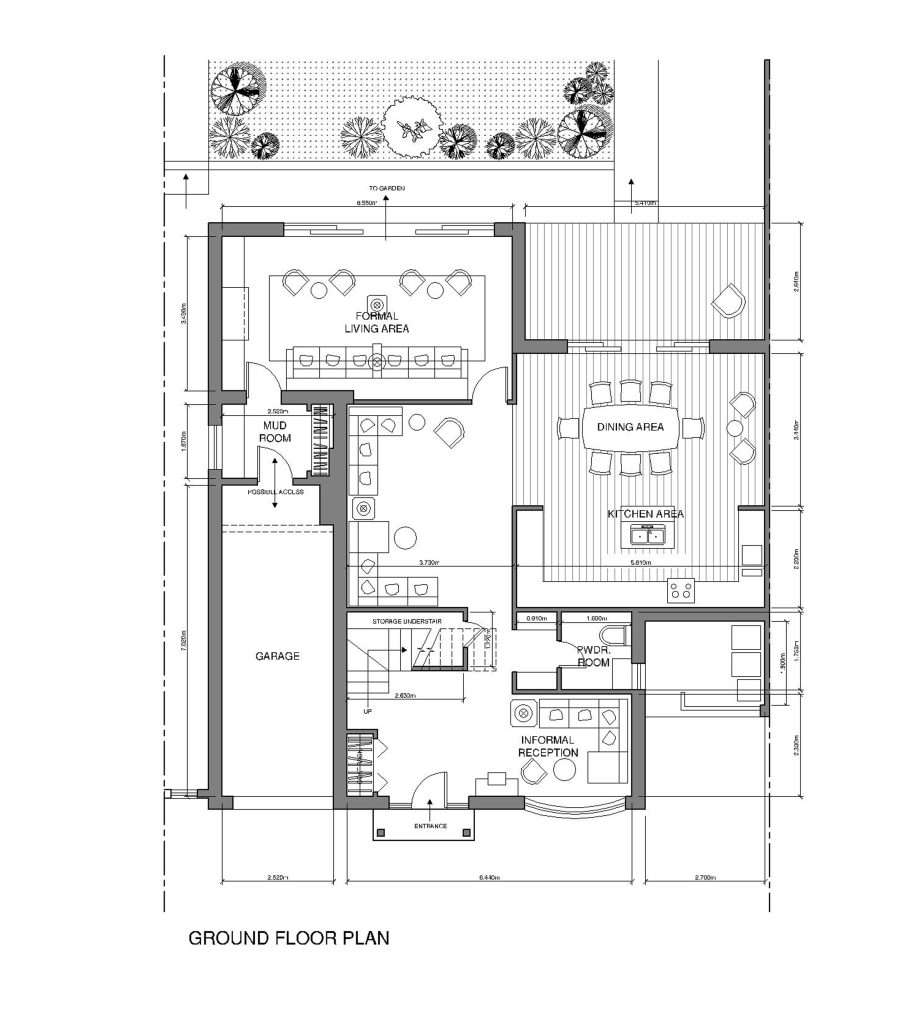
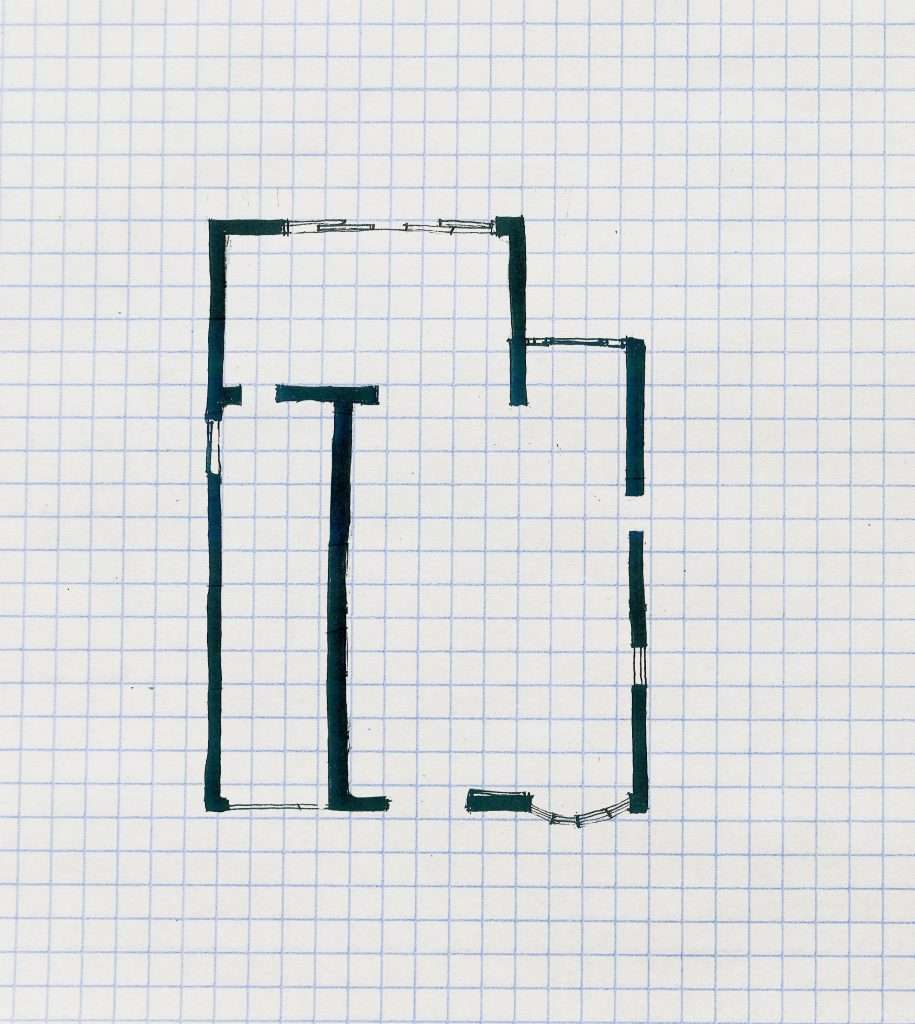
With your scale set, you can now start outlining the walls of your room. Use your newly created ruler (whether on paper or digitally) to measure and draw the exact dimensions of your room. For a 7-meter wall, for instance, place your ruler down seven times to mark the correct length. Repeat this process for each wall, paying special attention to any angled or irregular shapes that may need extra care in measurement.
If your room has angled walls, start by drawing two adjacent walls to give yourself a reference point. Continue around the room until the entire outline is sketched. This creates the foundational framework of your floorplan.
Adding Windows, Doors, and Stairs
Next, you’ll want to mark windows and doors. Measure not only their width but also their position along the walls. For windows, draw a simple rectangular line, and for doors, use an arc to indicate the way they swing open. Doors opening to the left should have the arc facing that way, and doors to the right should follow suit.
If your room includes stairs, indicate their position with a set of lines and an arrow showing which direction is up and which is down. This helps when visualizing flow through the space.

Drawing the Furniture
Now that the room’s layout is done, you can start adding furniture. Measure each piece and scale it down just like you did with the walls. If you don’t know the exact furniture you’ll use yet, you can work with standard sizes to get a sense of how much space you’ll need. For instance, a standard dining table might be 2 meters long, which you’ll scale down accordingly.
If you’re using digital tools, it’s easy to move furniture around to test different layouts. If you’re working on paper, you can cut out scaled pieces of paper representing furniture to shift them around and see how they fit.